|
Open a new image--width 720 x height
576 at 72 pixels per inch (ppi).
Save your file as a psp file with
whatever name you choose and remember to save it periodically as you work.
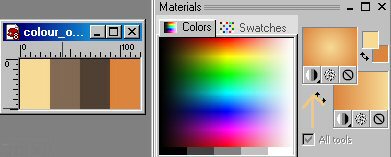
Open your Color Options jpg and select
the eye dropper on your tools bar. With the eye dropper right select
the cream color and left select the orange and you will see that they are
now the selected colors in your materials.
Make sure you have selected the
gradient by clicking on the box below the color to the left.
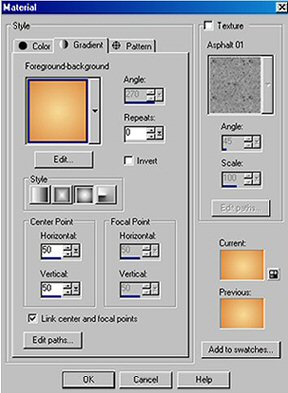
Flood fill the layer by selecting the
Flood Fill tool in your tools bar and right clicking on your mouse.
Name that layer Orange Gradient and
duplicate it.
On the first duplicate, go to Effects>>>Texture
Effects>>>Blinds.
Uncheck horizontal and use eyedropper
to select the brown from your color swatch for the color.
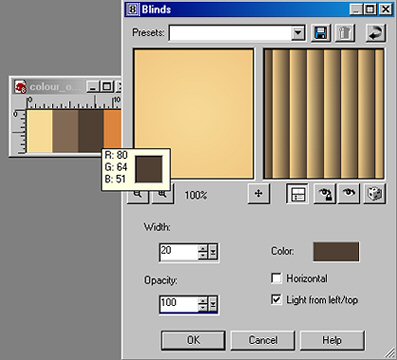
Click ok.
Right click on the layer in your layer
section to the left of your screen sand name it Blinds.
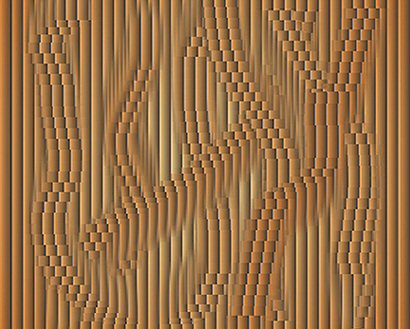
Duplicate that layer and go to Effects>>>Distortion
Effects>>>Twirl, 150 setting.
Click ok and then repeat by hitting
Ctrl and y at the same time.
Right click on this layer and name it
Blinds Twirl.
Go back to Blinds layer and duplicate
layer.
On the duplicate layer select the Push Brush from your tool
bar.
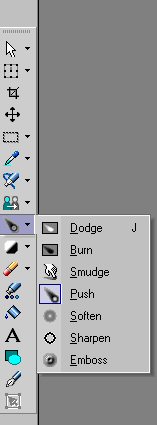
with these settings.

Make random pushes on the
blinds,
then right click on this layer and
name it BlindsPush
You now have a background layer of
Orange Gradient, Blinds layer, Blinds Push layer and a Blinds Twirl layer.
Right click on the Orange Gradient
layer and select new layer. Name this layer Orange and move to the
bottom of the layer stack for the time being.
Flood fill with flat orange background
by changing the gradient to the solid orange color. Move the Blinds Twirl
layer above the Blinds layer.
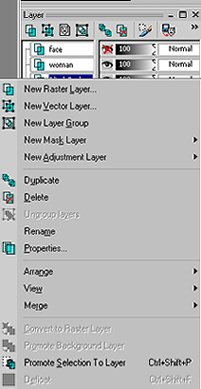
Open your woman's face tube and the
woman dressed in white and copy and paste each one as a new layer.
Make all layers invisible except the
Blinds Twirl layer and the woman dressed in white.
Select the selection tool, rectangle
and on the Blinds push layer
draw a rectangle large enough for the
woman to fit inside.
Go to Selections and click on promote selection to
layer and name it Rectangle.
Create new
raster layer below the rectangle layer. Go
to Selections>>>Modify>>>Expand 10 pixels. Click
arrow by your top color swatches so that the orange is in the top square.
Click on your right mouse and flood fill the selection in the new layer with this gradient. 
Go
to Selections>>>Modify>>>Contract 10 pixels, hit delete
key and deselect and name this layer Frame. Go to
Effects>>>3D Effects>>>Inner Bevel with these
settings, 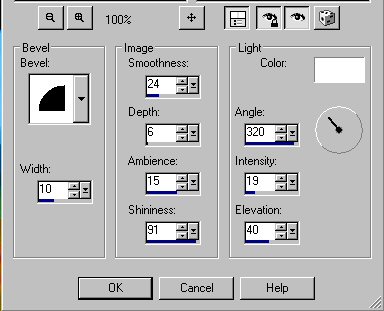
Go
to Effects>>>3D Effects>>>Drop Shadow with the settings
of 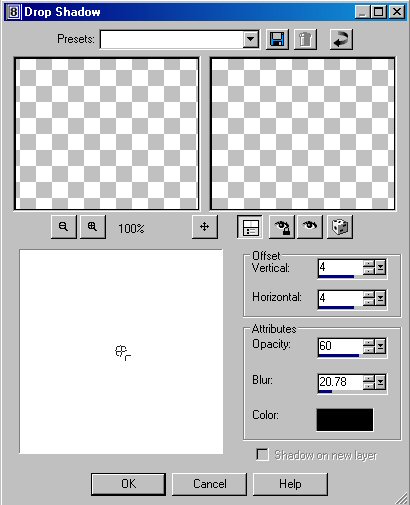
Then
change the vertical and horizontal to -4. Make
sure the frame layer is above the push blinds rectangle that you cut
out.
Close all layers except these two layers and go to
Layers>>>Merge Visible and rename layer Frame Twirl.
Select your moving tool and move frame to lower left and
make woman layer visible. Move her over the frame as shown in finished
tut above. Make both layers invisible. Click
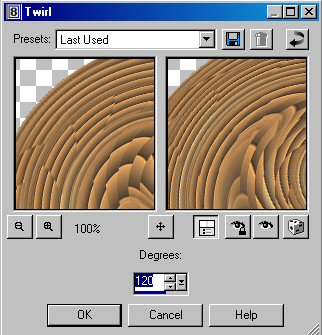
on the original rectangle layer and go to
Effects>>>Distortion>>>Twirl, using these settings and
then repeat Twirl.
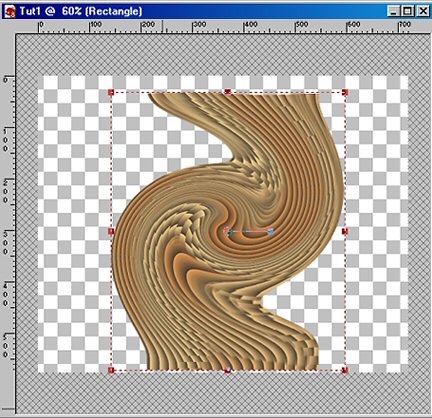
Using
deform tool, stretch out the twist by pulling on the upper and lower
center small red squares so that it comes to the top and the
bottom of your picture.
Click
on mover tool and move to the right. Open
the Face layer and place the face over the center of the twist. Reduce the size of the face by going to Image>>>Resize with
all layers NOT checked. Repeat until it is a size that fits your
twirl.
Delete layer Blinds Twirl and Blinds. Arrange
layers with blend settings and transparency of layers as shown
below. You may need to vary the settings as each of your layers will
be somewhat different from mine. 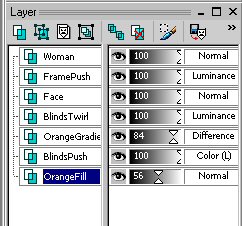
Go
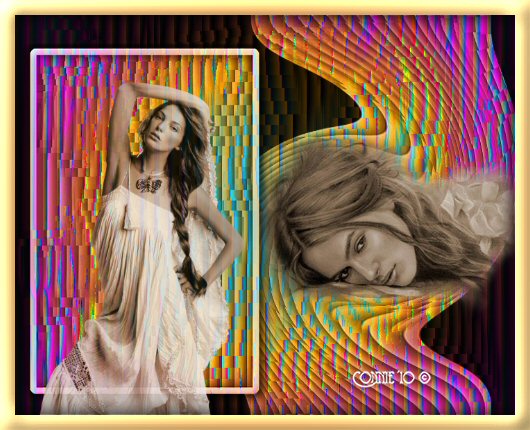
to Layers>>>Merge>>>Merge All. Now
we will frame it by going to Image>>>Add Borders set at 15 pixels
wide. Use Magic Wand to select the border and flood fill as in the
previous frame with the same bevel and drop shadows. Put your
signature on the picture and save as a jpg. That's
all folks!! I hope you enjoyed it.
|