|
Open the Abstract 01 image contained
in the zip file, duplicate and close the original image.
I like to duplicate the original layer
of the Background just in case.
Save your image as a psp file with
whatever name you choose and remember to save it periodically as you work.
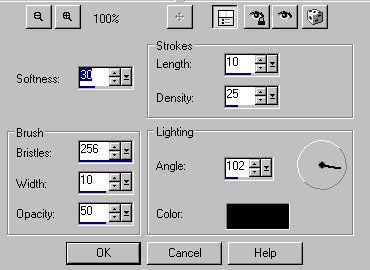
Go to Effects>>>Art Media
Effects>>>Brush Stroke with these settings and click ok.
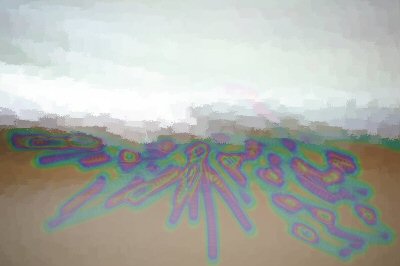
Duplicate this layer and then click on
Effects>>>Distortion Effects>>>Twirl, degree set at 120.
Click on your original Brush Strokes
layer and select your Hue Up/Down Brush here.

Use these settings.

When using this brush, you will get
richer colors if you use one big stroke for it,
as below, rather than several separate
strokes.
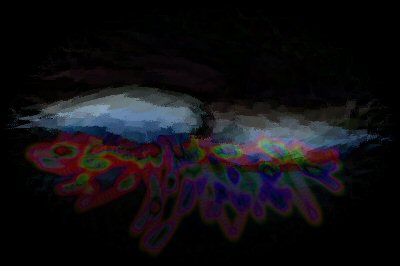
Make sure the Twirl layer is above the
Hue Brush layer and set the layer blend mode of Twirl to Difference.
It will now look similar to this.
Select a couple of your favorite
colors for the Materials Color Palette and set the bottom one to gradient
and the top one to solid color.
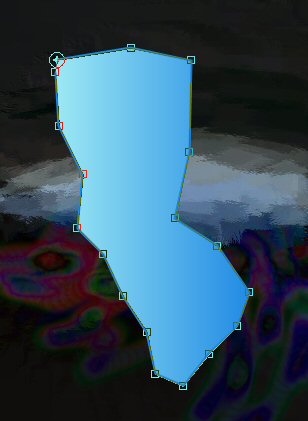
Select the Pen Tool and use these
settings.

Draw a shape similar to below on the
left part of your image by clicking where you want the edges of your shape
to be,
and it will automatically fill in your
shape with the solid color as the outline.
Convert layer to raster and set the
layer blend mode at difference.
Draw a second shape on the right hand
side of your image, convert to raster, set blend to difference.
You can right click on the little node
squares, and by holding your finger on the mouse,
you can move the nodes if you want to
change your shape.
Close all your layers except your Hue
Brush layer.
Using the Pen draw around part of your
pen strokes so that you have a third shape in the middle of your image.
Again convert to raster, set blend
layer mode to difference.
I moved my outer two shapes in to
where they slightly overlapped the middle shape.
Pull your Twirl layer up above the
three shapes.
You may decide that your image looks
better if you lower the opacity of this layer.
Click on your text icon and then click
on your picture. Select a font that you like. I used
BrushScript MT set at size 30.
Make sure your top color materials box
is set to the darkest color and your gradient is in the bottom color
box.
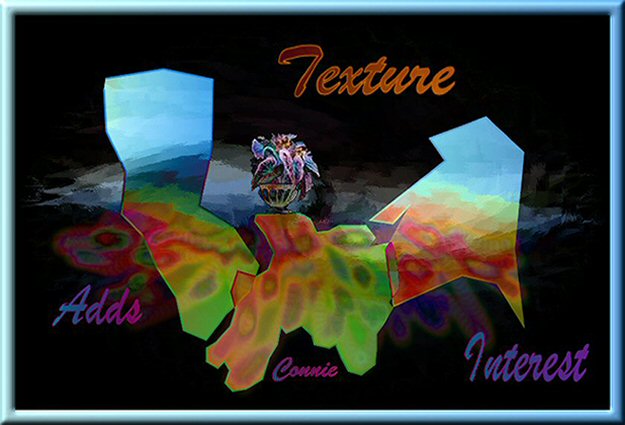
Type in Texture and apply.
Sometimes I will pull the shape out longer by using the Vector
boxes.
When you have your script how you like
it, change the layer to raster.
Type in Adds, follow directions above.
Type in Interest, as above and then
add your signature.
Pull the Twirl layer above the text
layers and add a favorite tube or you can use the one in my materials
folder.
I also put it below the Twirl layer.
Save as PSP file.
Copy image merged and paste as new
image.
Image>>>Add borders set at 20
pixels.
Select magic wand with tolerance and
feather set to 0, and click in border.
Flood fill with gradient.
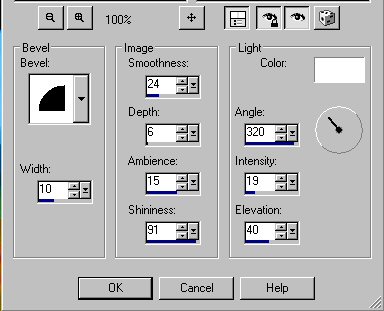
Effects>>>Inner
Bevel>>>3D Effects with these settings or use your favorite
frame.
Deselect and save your image as a jpg
file.
That's
all folks!! Enjoy!
|